Tired of hearing from me about my projects? I am. So thank goodness I’ve convinced an amazing set of ladies to be guest project bloggers. Our first blogger is my dear friend and one of my favorite kick butt females, Tori. Thanks for indulging my blog adventure, Tori. Here we go! PS – Tori is better at this than me already and she provided photos of each step of her project. Make sure to check out the collage at the end to see what your hanging planter project will look like along the way!
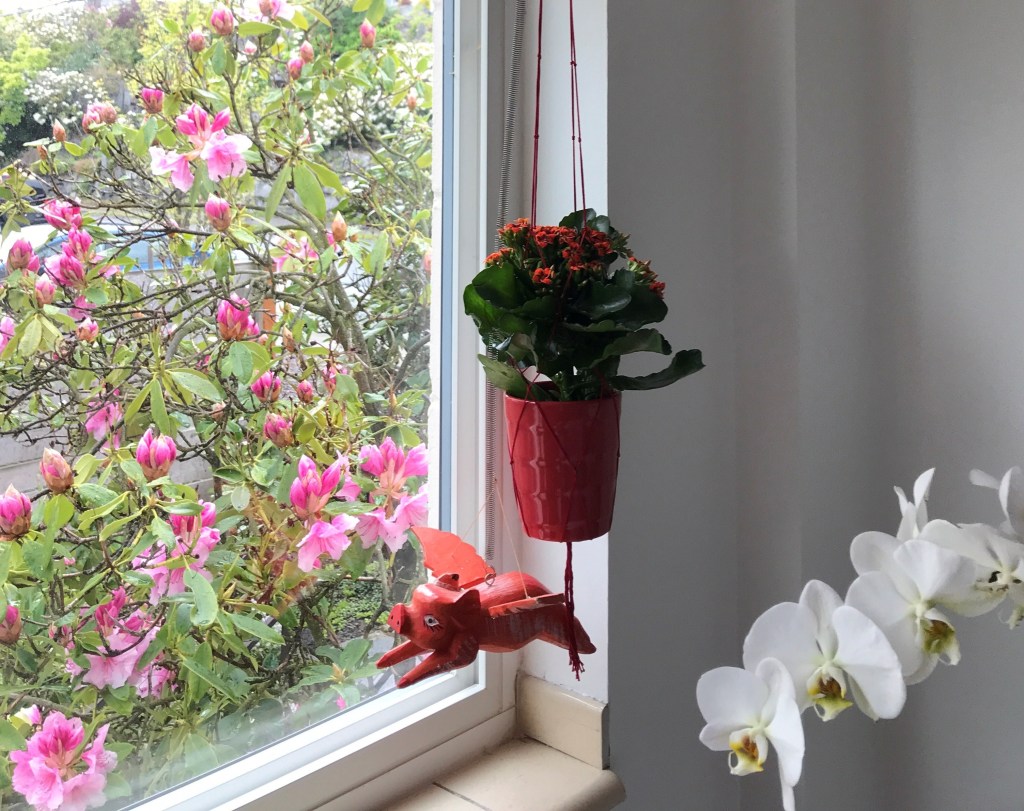
Intro to me and my project: I am so grateful to be guest-projecting for my beloved Eileen. My name is Tori and I met Eileen while working together in DC. I am a former musician, neuroscience lover, and recent millennial plant band-wagoner! If you, too, have jumped on the plant trend, this project should help transform some of those basic pots into stand outs. I love an impulse Trader Joe’s or local nursery buy, but vehemently hate the basic pots that come with it. I have no idea why they irk me, but I want cool pots and I want to spend almost zero money and that’s the way it is to be. So I devised a little, impeccably easy way to make hanging pots out of those free ones.
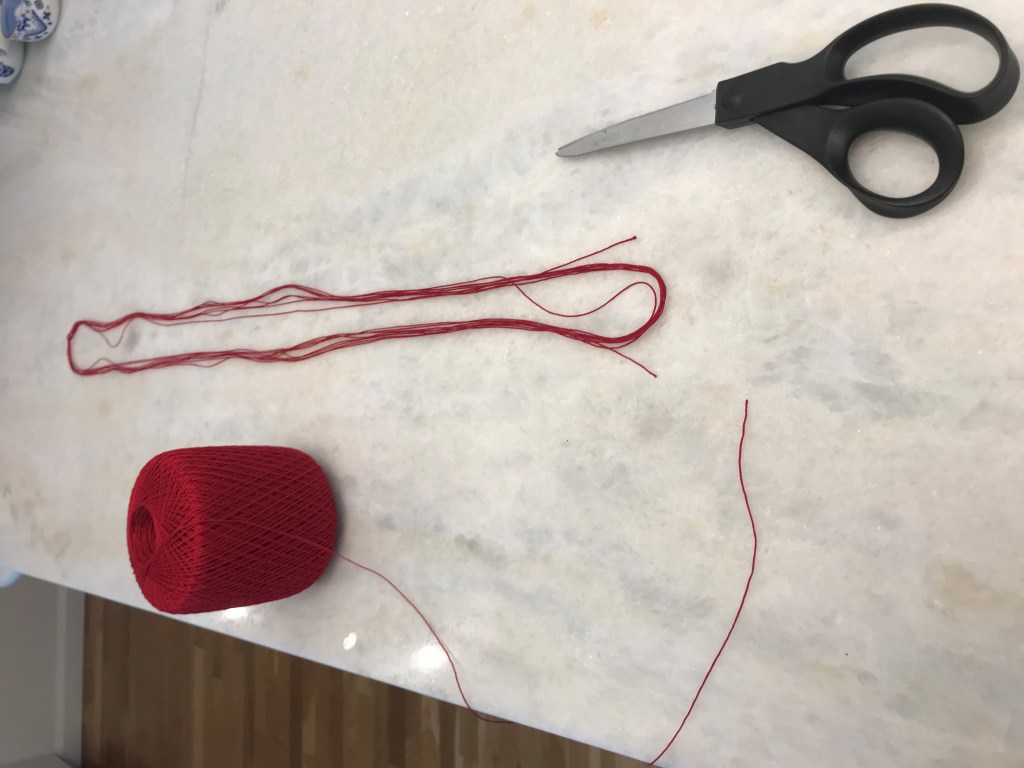
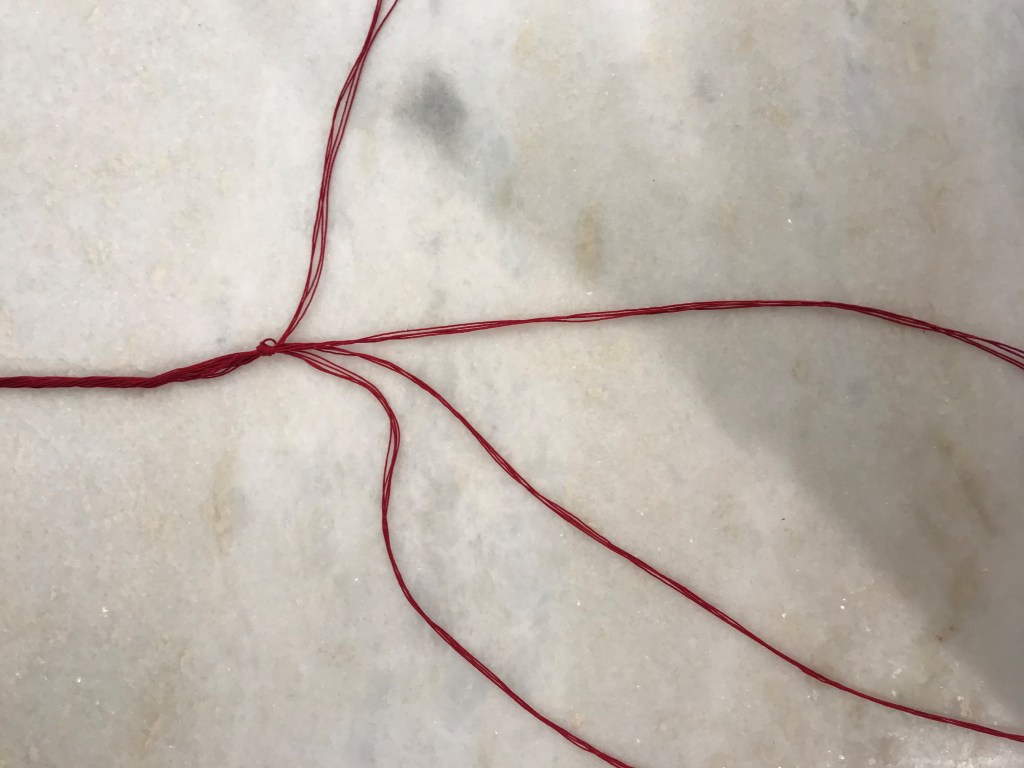
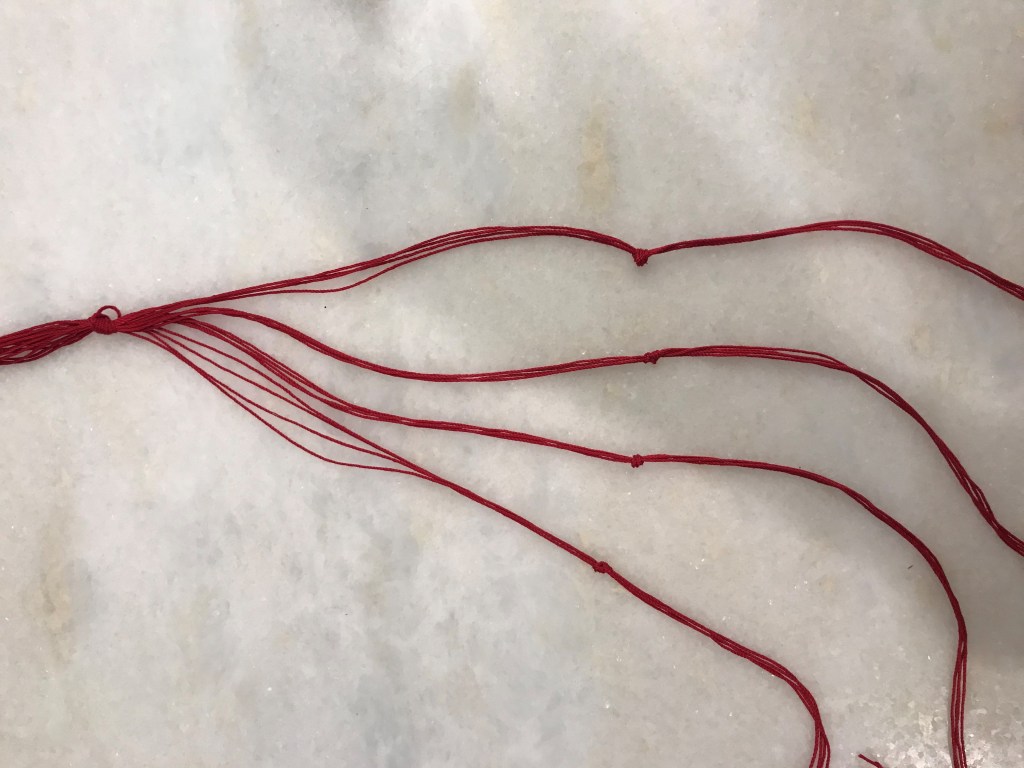
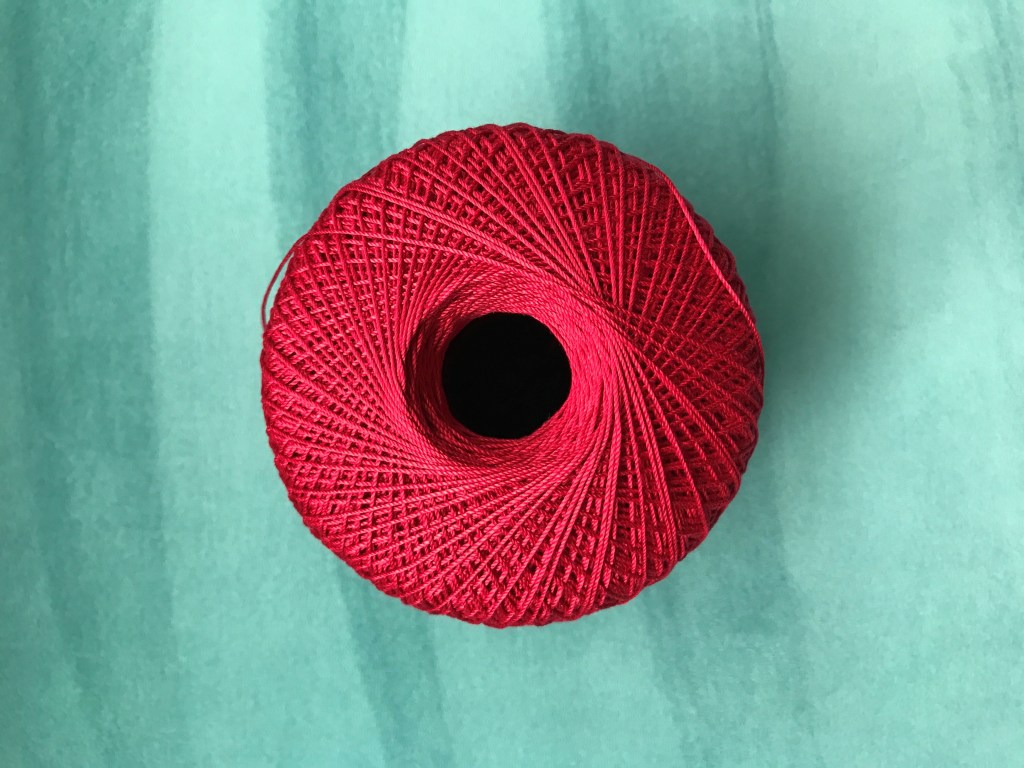
Quick project summary: Take your ugly basic pot, mine was red, and find a color of super basic string or twine that goes with the basic park. I chose red, fairly thin string. If your free pot bottom is larger than your palm, get sturdier string so it’ll hold up. Measure the length you’d like the pot to hang, say you’d like it to hang down two feet, and add 8-12 inches to get your total length. Loop the string so that each side of the loop is your total length 8 times. You’ll have 8 strings on each side of the loop that are your total length, with both ends of the string end on the same place on the loop. Pull the loop taught so that one end is opposite the area where both the ends are. Tie the top of the loop 2-3 inches from the top that *doesnt* have the cut ends. Now, holding the tied off loop, which will be how you hang the pot, pull the whole loop taught and cut all of the string at the opposite end where the two ends were. From the top knot, section the strings into four groups of equal string numbers. Knot one bunch of four strings, as a unit, half way between the top knot and the recently-sheared ends. Repeat with the other three bunches. Lay the four knots out next to one another on a flat surface. From your new four knots, separate the strings into bunches of two, laid out. Halfway between the knots and the cut ends, form and tie new bunches of four; start with the second-to-the-left bunch of two, combine with a bunch of two strings originating from the knot-bunch to the right, making a V. Repeat so all of these new bunches have two strings from different originating knots. Combine the left-most bunch of two strings with the right-most bunch of two strings. Repeat the combining of strings and tying halfway between the last knot and the cut ends, paying close attention to make the knots roughly in parallel across the strings, until you have around 2-3 inches. Hold the hanging loop and pull all of the strings (now-net) taught, and tie all of the strings in a knot with 2-3 inches of string left out, like a tassel. Then, loving nestle the formerly ugly and basic pot through the large gaps between strings at the top. Place the pot centered over the tassel knot, and pull up on the hanger to test how the plant fits. Adjust your plant in your coordinating hanger, making sure you gently put the foliage through the net gaps, as when hanging there is a lot of pressure on the strings.
Things I loved about this project: It’s rhythmic! And actually simple. You get in a groove and it took me under 20 minutes. I also hate ugly
pots
And this fixes it for only $1.99 for string! And nothing gives me more joy than being frugal and cute.
What I would do differently: At first I just plopped my plant in and hung it, not realizing I could damage the leaves with the net. I also think it could look cool to have more strings, and just follow the “divide by four” rule and continue to halve.
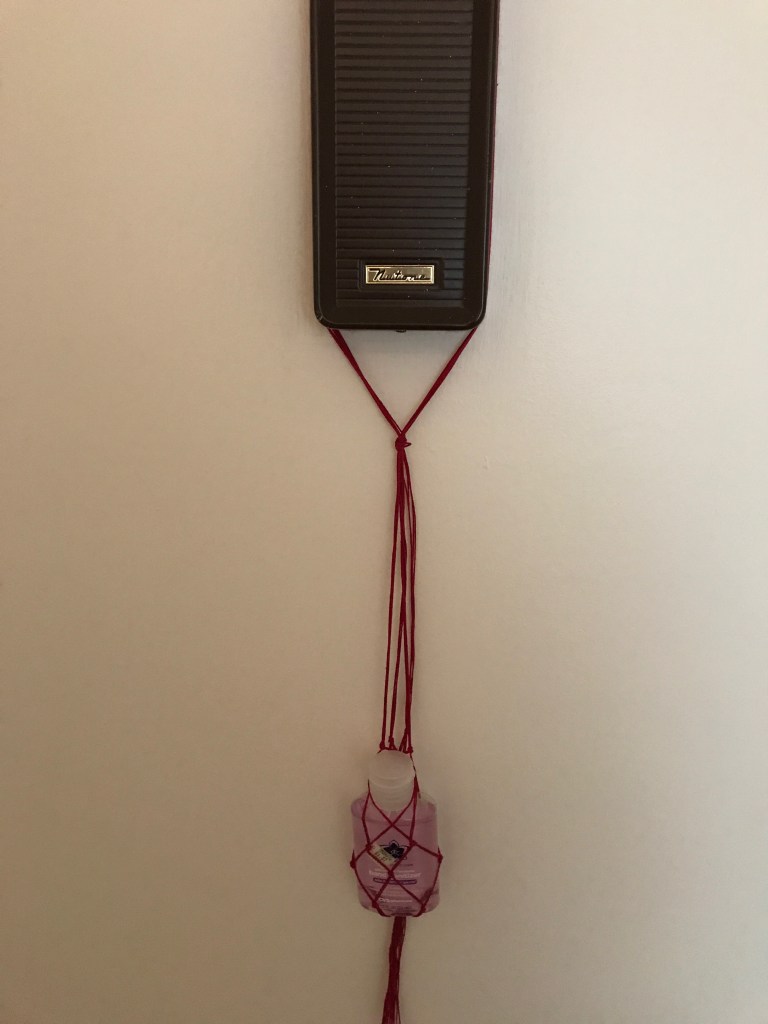
I also used this to make a small hand sanitizer that I strung up on my door so that I can sanitize as soon as I get home in the time of covid-19.
Things I also enjoyed while doing this project: I listened to Ologies, an amazing podcast in which Alie Ward interviews a scientist about their lives and expertise. I drank a lot of water which is technically boring but, remember to hydrate!


Cute! Someone just told me that they took a Radio Flyer wagon, drilled holes in the bottom and turned it into an herb garden. 🤩
LikeLike
That sounds awesome! Love an herb garden!
LikeLike