Project 19: Cannoli Dip

Cannoli Dip is one of those desserts I discovered in my early thirties and am so grateful that I didn’t discover it sooner because it is WAY too delicious to resist. So delicious in fact that I even brought a bowl of the dip instead of a cake to a friends 30th birthday a couple years back at her request.

Quick project summary: To make cannoli dip, I typically use this super simple recipe. There are some more complex recipes out there that include marscapone and such but this simple ricotta/cream cheese/confectioners sugar blend works nicely for me. I make no modifications to the recipe. That said, for items to dip, I like to take waffle cones and break them up into smaller pieces as well as both original and chocolate graham crackers. You could totally add fruit to this but I figure if you’re going to go with such a sweet dessert, may as well go all in!

Things I loved about this project: It’s delicious. Easy to make but still not a very common dish people bring to potlucks. And, by adding the items to dip, you can arrange a really pretty plate, too.

What I would do differently: This dip is pretty legit so there’s not much I would do differently. That said, making this dip makes me want to try making homemade cannolis as well!

Things I also enjoyed while doing this project:

-Bringing this dip to an awesome winery near Annapolis (Great Frogs) for my friends birthday

-Sampling a variety of different graham crackers and ice cream cones to pair with it

Project 18: 100 Days of Snail Mail Campaign

I may be one of the last humans on earth who still enjoys sending mail. Oh, and my dad, too. Nevertheless, I persist in my goal of trying to reinvigorate the world’s love of snail mail.

Quick project summary: This project requires very little explanation but here are some of my favorite snail mail writing concepts!

-Start with an old fashioned address book. I like having an address book separate from the excel spreadsheet on my computer because it allows letter writing time to be non-screen time.

-Find cheap stationary you love. For me, this is the Target brand of notecards that are all less than 5-6 dollars. I send probably 8-10 cards on an average week so I go through nearly a whole pack of notecards weekly.

-Make it a campaign. This winter, I started a 100 days of snail mail campaign to honor my grandparents who loved sending and receiving mail. Over the course of 100 days, I sent one letter each day and I put a little number on the envelope to the recipient.

-Make the letter writing a treat/routine. For me, this means that I’ll try to write a note at the end of each work day as a way to close out the day or I’ll dedicate some quiet time on Sunday evening to letter writing.

Things I loved about this project: As a somewhat anxious person, I love routines almost as much as I love ice cream (almost but not quite as much). Letter writing is a great little routine to have – it’s such a nice way to take time away from the screen and you can brighten someone’s day with what you send, too. I love receiving texts or thank yous from friends who get my cards and I love hearing back from folks who I haven’t been in touch with for a while. For me, letter writing is the perfect little project: a single letter can be done fairly quickly (with your 5, 10, 15 free minutes), it brings you a moment of calm/joy, and it puts a smile on someone else’s face, too.

What I would do differently: I don’t have any return address labels and I definitely need to purchase some!

Things I also enjoyed while doing this project:

-Listening to music/podcasts

-Drinking tea

-Basically anything you can do/have as background noise/activity!

Project 17: Peppermint Lip Balm

Making this lip peppermint lip balm has become a holiday tradition for me! I didn’t mean to do it annually and honestly every year I consider not doing it. Although it is amazing and I personally love using it myself, it’s also a bit tedious. But, each fall, like clockwork, a friend or family member will send me a text and say they’ve run out of the lip balm from last year and can’t wait for more. And, so I make the lip balm annually and I’m always glad I did!

Quick project summary: I’ve tried a few different recipes for the lip balm over the years but I typically use a variation of this one. That said, instead of the sweet almond oil, I use vitamin e oil because it’s so good for your skin and I think it adds a bit of a healing element to the lip balm during the cold winter months.

The recipe is great and easy to follow but here are a few tips and tricks from me:

-I personally prefer to make the lip balms in actual chapstick tubes instead of in the small round tubs. I think it’s easier to put on and you don’t have to touch the lip balm every time you want to apply.

-You may also want to have some tiny pipettes on hand to put the melted lip balm mixture into the tubes. I order these in bulk off amazon because I throw them out after being used (the lip balm mixture sometimes get stuck in the pipette and makes it a little icky) – there’s enough in the package that I am able to work through it for several years. I’m sure you could find smaller sets of them.

-You can flavor the lip balm almost any way you want to or apply tint, too. I haven’t found any tints I really like so I keep to the natural color which you can see above. Additionally, for the peppermint flavor, I like to add more than the recipe calls for – it gives it a nice refreshing feeling when you put it on your lips. I would use a cheaper peppermint oil – no need to splurge on something pricier for this project.

Things I loved about this project: This project with the pipettes and melting process takes me back to seventh grade science and I’m not mad about it. It’s fun to turn the kitchen into a science fair vibe every once in a while. Jokes aside – this is one of the most useful projects – for myself and as a gift. It’s also super cost efficient so I make it in bulk – probably about 120 balms at a time which I package in little bags of 3. With the larger quantity, I typically gift these to my coworkers at the holidays and then use them as present toppers/add -ons for family and friends.

What I would do differently: As you can see above, my packaging is not super snazzy. And honestly, it’s just because I’m a bit lazy. These lip balms could step it up a notch with labels (which you can easily print online) and some prettier wrapping! Because of the way I gift them, I haven’t tried that but hope to in the future. I also have a pretty lame double boiler situation which is basically just a pot with a glass measuring cup inside – it works fine but I could definitely amp up my set up.

Things I also enjoyed while doing this project:

-Listening to Christmas pop (I guess you could do this now for “Christmas in July”)

-Smelling the house full of a fresh peppermint scent

Project 16: Simple Dinner Rolls/Buns

Just in time for July 4th, I wanted to share how easy and fun it is to make dinner rolls/hamburger buns. After my experience making these, I genuinely do not plan to buy a hamburger bun or dinner roll again. Also, I’m combining these two projects into one since they’re so similar!

Quick project summary: The first time I made both of these recipes, it stemmed from necessity so I was not messing around with any buns requiring a long rise. For this reason, I used a 30 minute dinner roll recipe to make small peel-apart rolls for pulled pork sliders and a 40 minute hamburger bun recipe.

Both recipes were easy to follow and the process of making rolls in general, was much simpler than expected. That said, both of these recipes over-estimated the number of rolls/buns you would get out of them. For me, the dinner roll recipe indicated it could make up to 18 rolls – more realistically, I think 12-15 rolls yielded solid slider-sized rolls. For the hamburger buns, instead of 12, I made 6 buns and they are big but delicious – to get a size similar to something from a grocery store I would probably make 8 buns.

Things I loved about this project: These rolls taste so much better than store bought. And, they’re ridiculously easy. Most of all, they require little advance planning so I was able to make them in a hustle when we realized we had burger but no buns for Memorial Day or unexpectedly wanted some pork sliders.

What I would do differently: For the dinner rolls, I think they turn out best when you make them in a container where they can puff up, and join together. I would definitely make them in a bit of a tighter pan versus the larger 9 by 13 which I used. For the hamburger buns, I now add an egg wash on top pre-baking to get a bit more of a golden brown top without burning the bottoms.

Things I also enjoyed while doing this project:

-Eating delicious hamburgers and pork (not made by me)

-Drinking maple whiskey from Cape Charles Distillery

Project 15: Bagels

Bagels scared me. I saw all these people instagramming photos of their gorgeous bagels and I would think: how the heck did they do that? or, I can’t possibly make bagels like that, right? or, wow, that must have taken forever, I don’t have time for that. Wrong. Bagels are not as hard as you think. Highly recommending giving bagels a try!

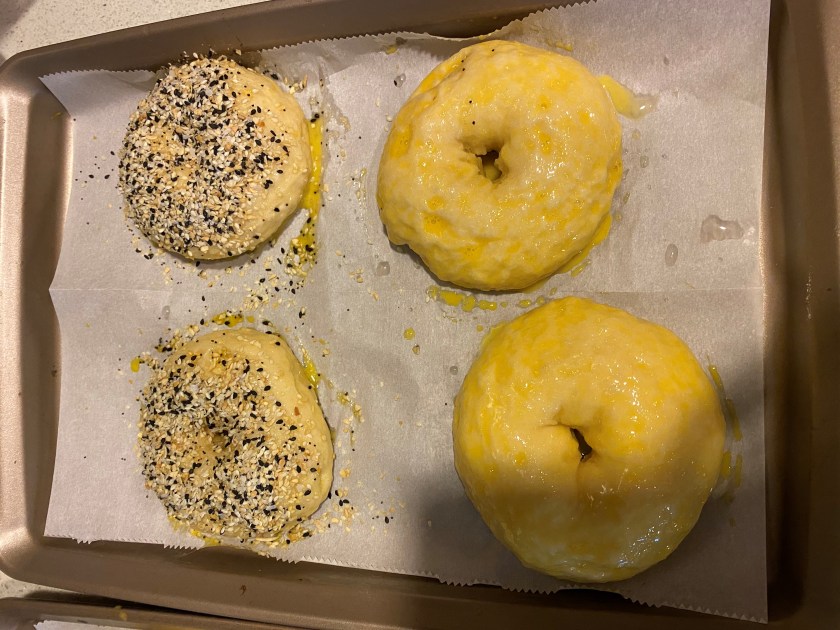
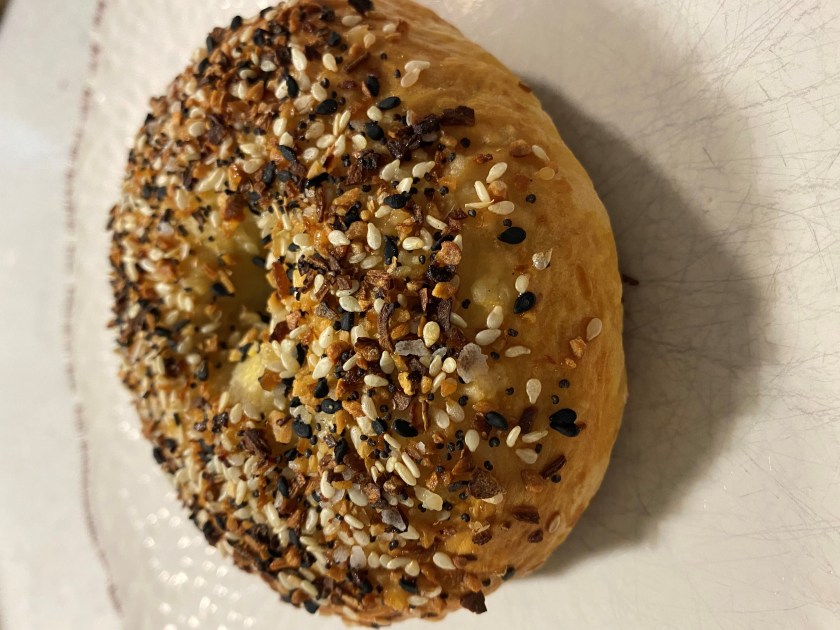
Quick project summary: To make bagels, I used the Sally’s Baking Addiction Recipe at the recommendation of a family member. There are options for plain, everything, etc on her site but the basics are the same. So far, I have made everything and plain and I actually made no modifications to this recipe. Ok, well, maybe some: I got a bit lazy with the everything bagel and just used an everything bagel spice mix instead of actually making my own. Oops!

Despite making no modifications, here are a few recommendations I learned along the way:

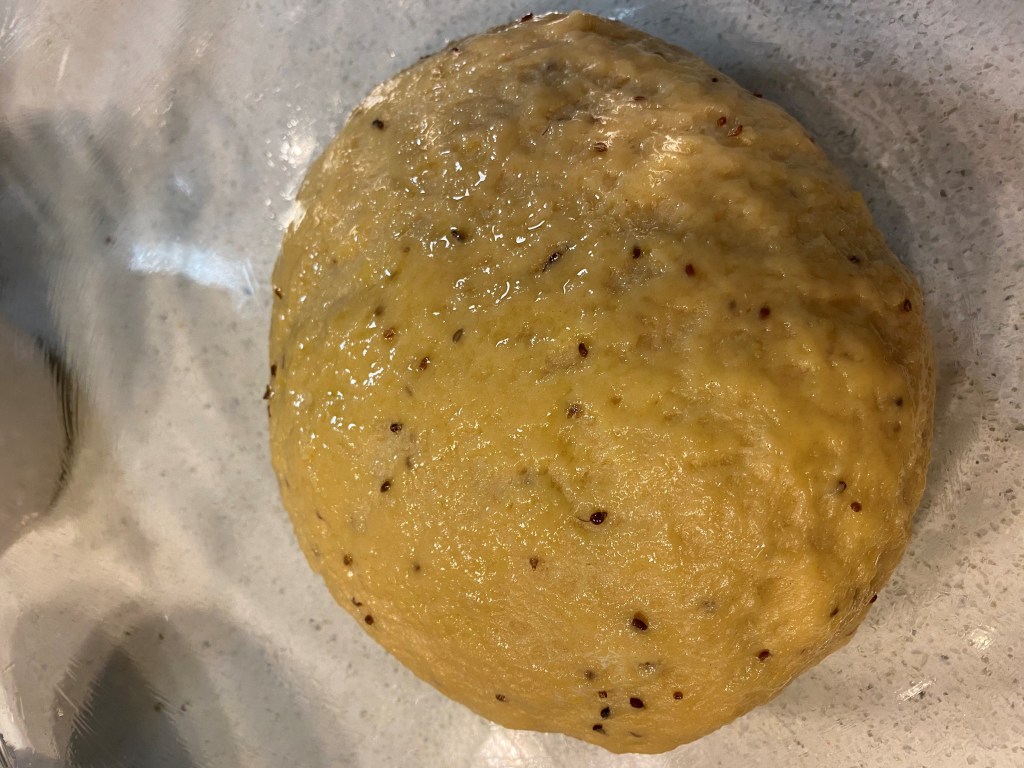
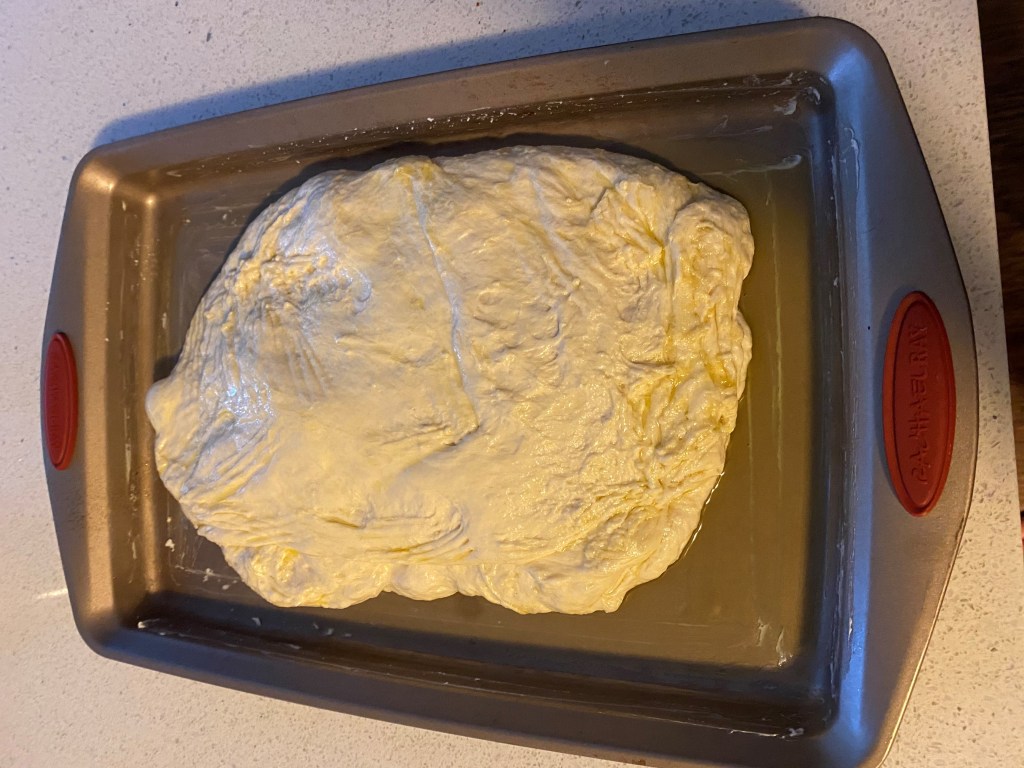
-The dough will be very thick/stiff. This meant that shaping the bagels was a lot harder for me the first time than I anticipated (or than Sally’s recipe describes). Overall, my recommendation is to take the dough and really fold it over itself/work it until you get a smooth texture on the top of the bagels. I was a bit worried this would deflate the bagels but it didn’t.

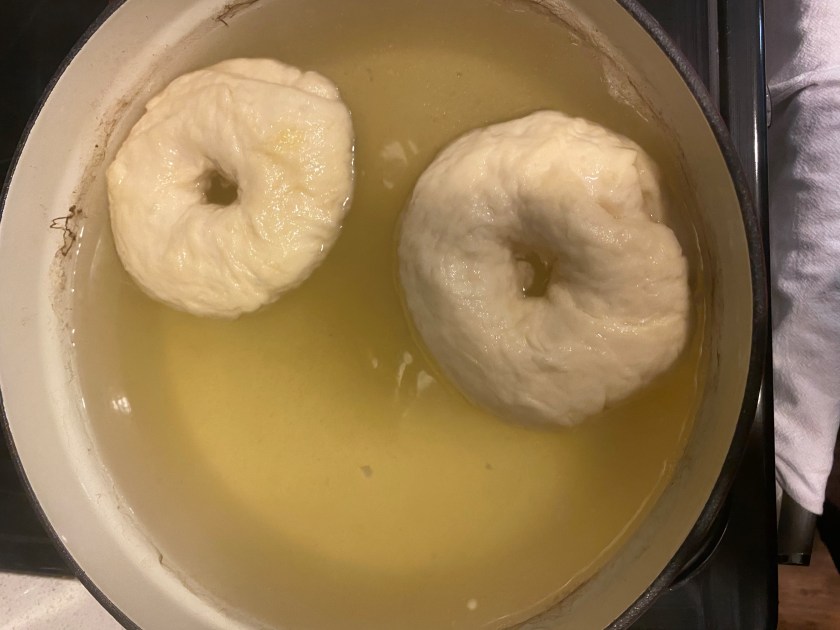
-The water bath process stressed me out the first time. Between flipping the bagels in the water bath and timing them, I felt like I was on my own personal episode of chopped. I realized after making these a couple times that the timing for the water bath did not need to be exact – whew! This brought a lot of relief and resulted in a lot less bagel flipping stress.

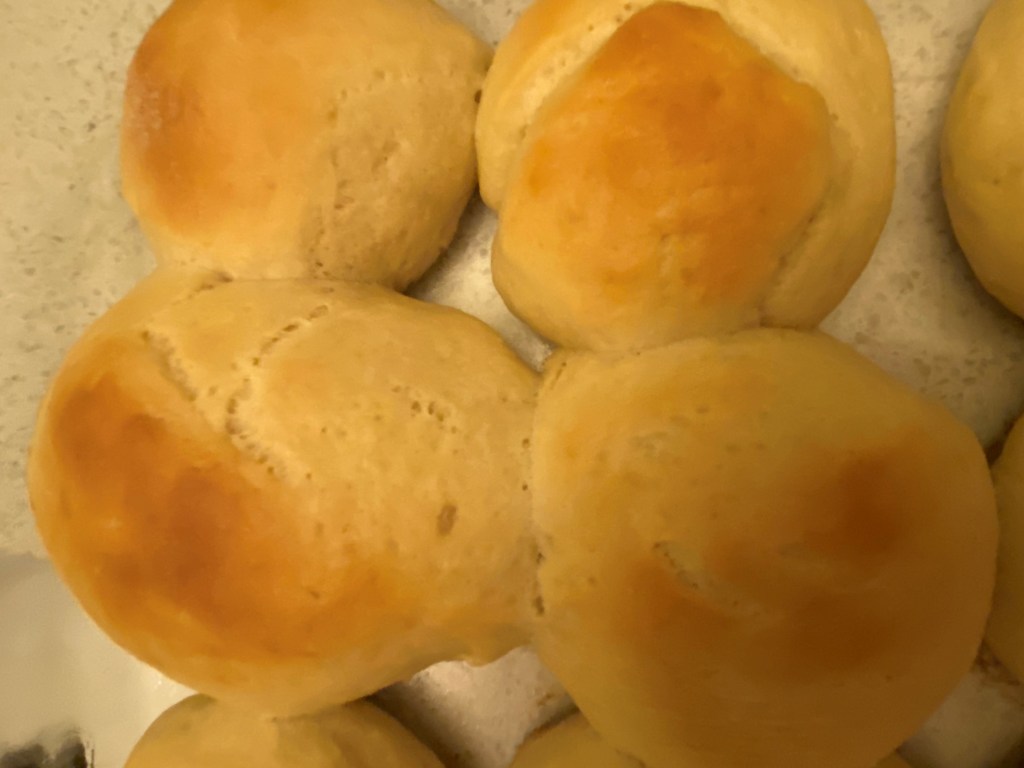
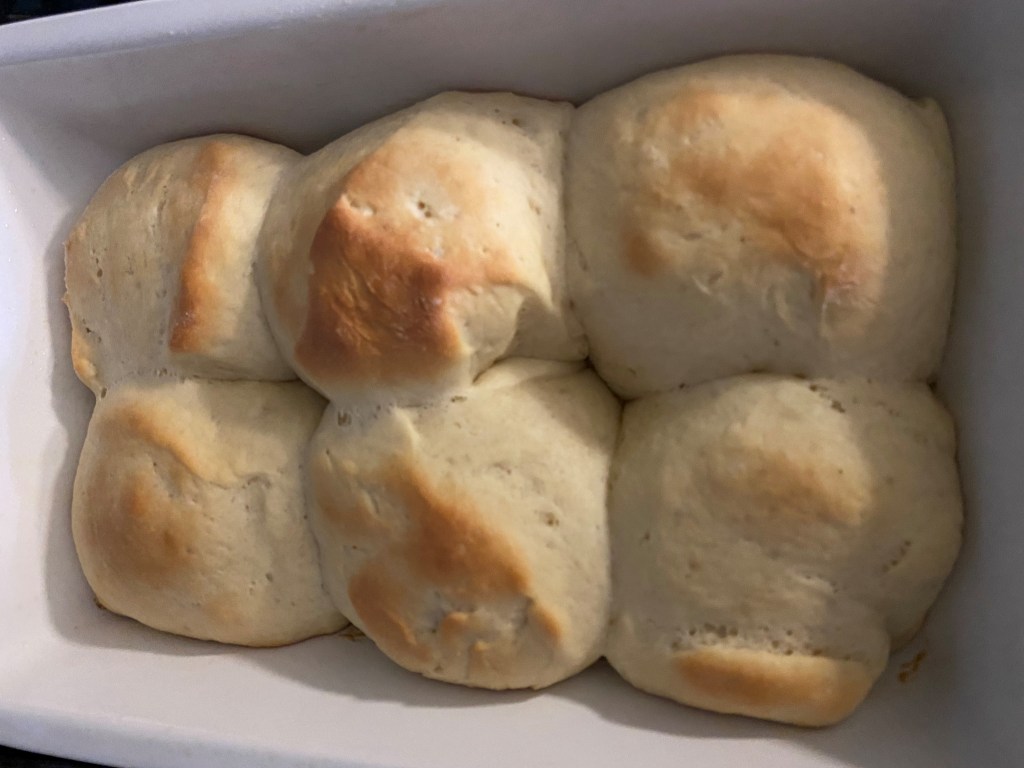
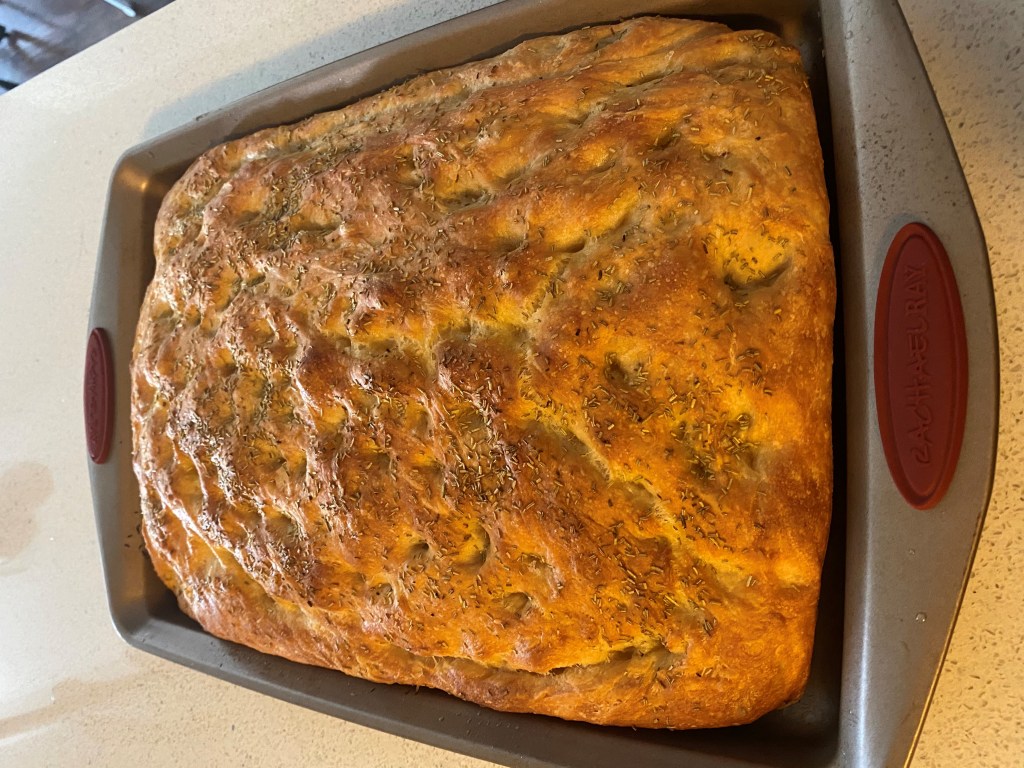
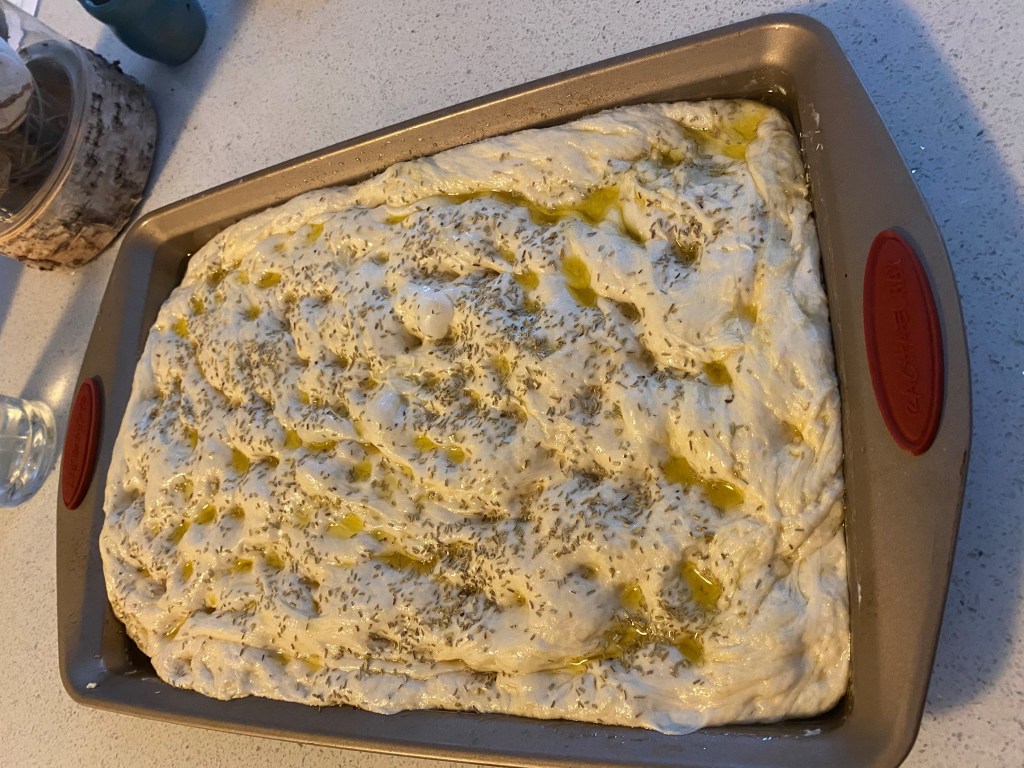
-Know that the bagels will still look pretty tiny before the water bath. I was surprised at how much they puffed in both the water bath and the oven! At first, I thought I may have accidentally made bagel bites when I first shaped them but they puff much more than you might expect.

-For scooping the bagels out of the bath, they need to go on the baking sheet where you plan to bake them. They get a bit sticky and you won’t want to move them after putting them down once. The first time I made them, I used a spatula to scoop them out of the bath and they were a little more wet when I placed them on the baking sheet than I’d hoped. I’d recommend a tool like this which was gifted to me by a bagel baking angel – it’s a lifesaver.

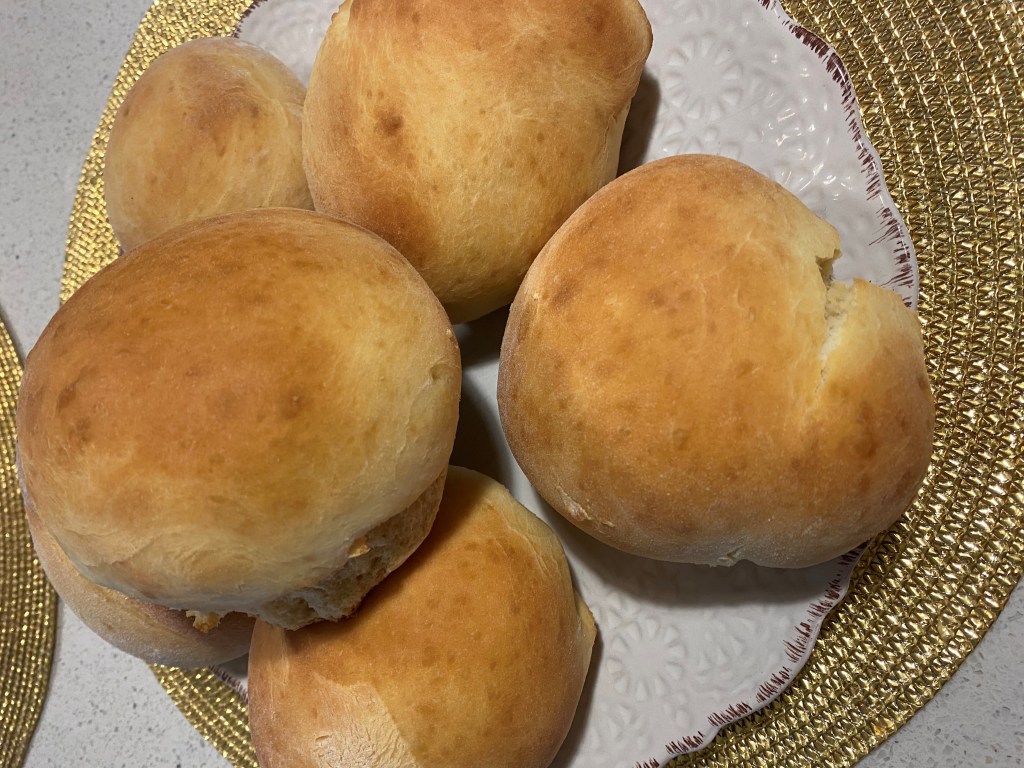
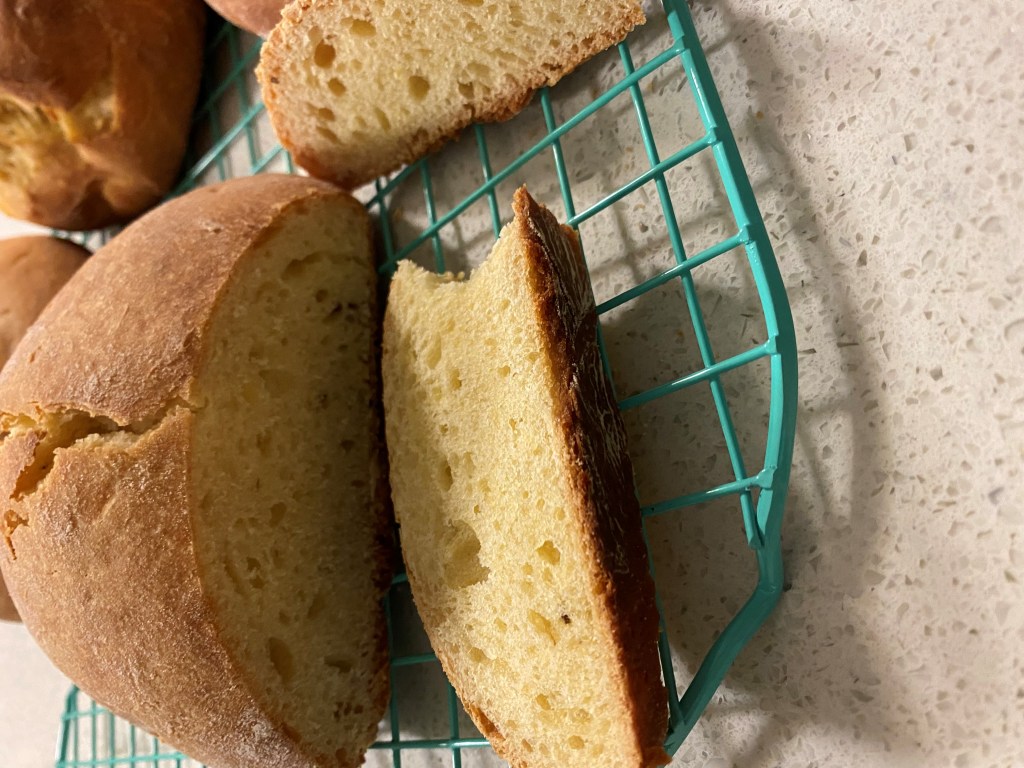
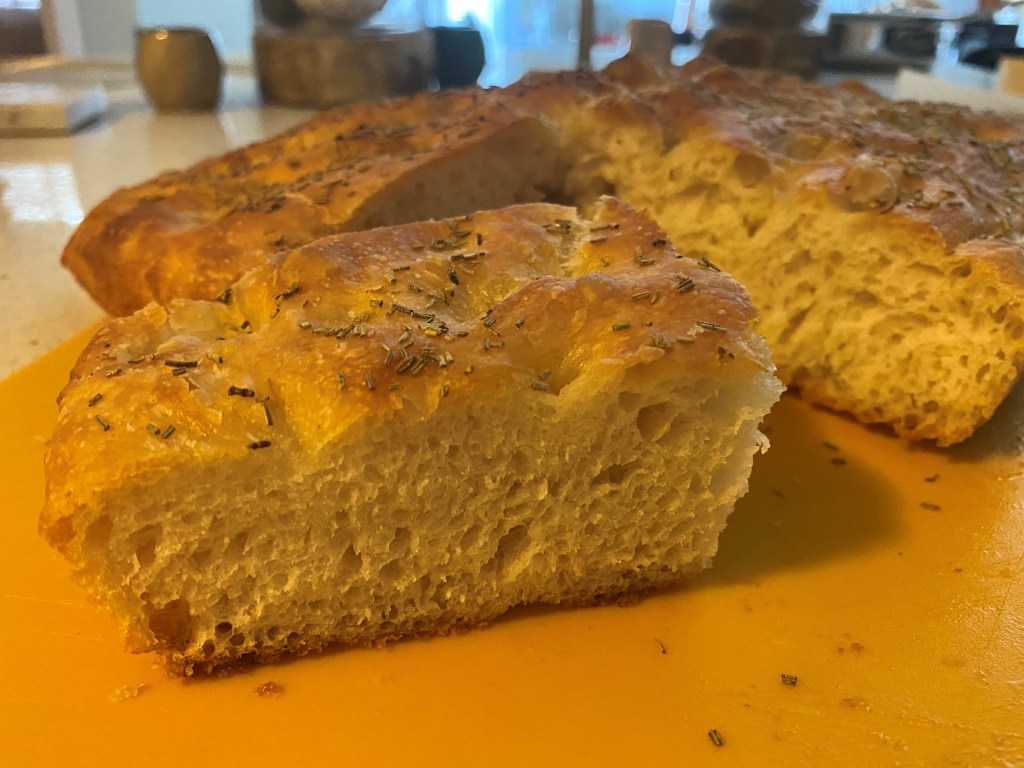
Things I loved about this project: Everything (bagels). The bagel making process was fun and interactive. I loved that it was different than anything I’d ever done before with the water bath situation. And, I was so shocked that these tasted like “real” store bought bagels – delicious! Plus, I conquered one of my baking fears! Maybe donuts are next?

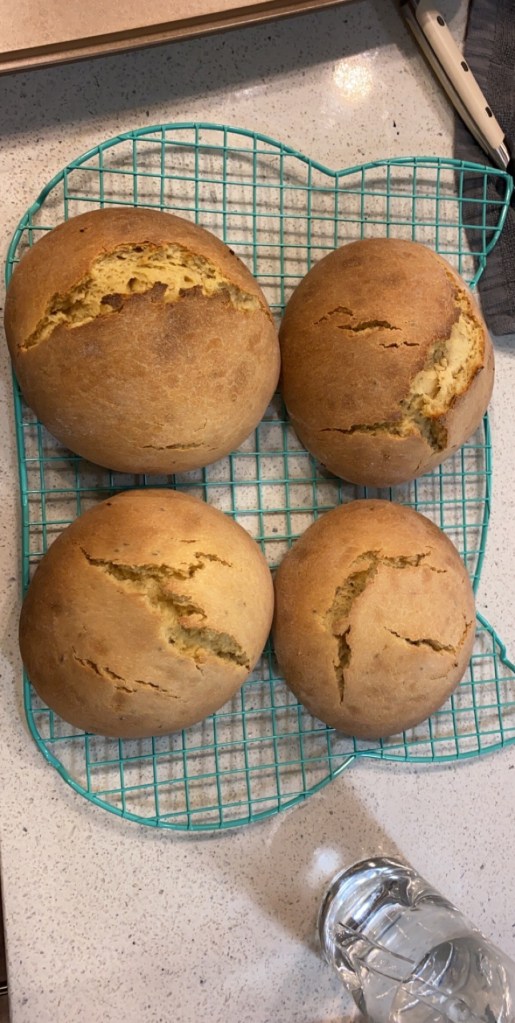
What I would do differently: As mentioned above, I’d definitely be a bit more aggressive with my bagel shaping. Round 1 of bagel making for me consisted of 4 decent looking bagels and 4 pretty ugly/split bagels (don’t worry, we still ate them!). By round 2, I was much more confident in my bagel shaping and all 8 bagels looked pretty normal!

Things I also enjoyed while doing this project:

-Burning my “joy and laughter” candle from Target

-Eating whipped Philadelphia cream cheese on my freshly made bagels (Seriously, I didn’t know whipped cream cheese was a thing until very recently but it’s delish!).

Project 14: Lemon Anise Bread

For many years, I have talked with my cousins about attempting to bake my Great Aunt Susie’s Italian Easter Bread. We made this bread every year during Easter week – my Great Aunt would come over at 5 AM and we would bake all day until bed time (which of course got extended to 8 PM in honor of bread baking – score!). I also have some great memories of the “flour fairy” coming to visit (aka: Aunt Susie putting little streaks of flour under my eyes like football players have eye black), rising the bread on the radiator, and wearing costumes while we baked. This family time and learning to cook with family members inspired my love of baking and I’m so thankful for it! Also, admittedly, my stubbornness is one of my best and worst qualities – I most definitely get this from the generations of ladies who raised me (most of whom were there for Easter bread baking each year) and I am so thankful to them for it.

Despite my enthusiasm for this bread and the experience surrounding it, however, I avoided baking it thinking it was a bit overly complex (especially considering this was an enriched dough that has been nearly impossible to replicate). The additional time at home this spring inspired me to give it a try. I won’t say that this bread was easy – it’s a lot of work but the end product is delicious and most importantly brought me back to some awesome childhood memories.

Side note: people have tons of names for this bread! Aunt Susie called her recipe Spianata. You’ll see this also called Italian Easter Bread, Pane di Pasqua and a few other names.

Quick project summary: Your first step if you endeavor to make this bread is to decide what you’re looking for in a recipe/flavor profile. For me, I was trying to replicate Aunt Susie’s recipe but did not have all of her ingredients on hand (she used Crisco and a few other items that are less common now). With that in mind, I was looking for something with a focus on lemon and anise and not a lot of “fluff”. Ultimately, I selected this recipe and loved it.

If you do want more fluff, you might look for a recipe where folks are putting a hard boiled egg in the middle, braiding, using sprinkles and icing (delish), or that has a mix of orange and lemon flavors. There’s a ton out there!

I only made one modification to this recipe which was to double the amount of anise seeds. The first try, I used the anise recommended and the bread had great anise taste (because this recipe also calls for anise extract) but you didn’t get the nice visual and little crunch of the anise seeds. For all the recipes after this, I made it with double anise seeds – much better! Also, this recipe gives you the option for a simple lemon icing – I skipped this (even though I think it would be delicious) because Aunt Susie always said the quality/flavor was in the bread itself, not the add ons like icing.

Things I loved about this project: This project was a “taste of home.” I genuinely felt a connection to tradition and reflected on some amazing memories while making this bread. Baking is always comforting and relaxing to me but baking a recipe that channeled my childhood experiences and some of the women in my family who I admired so much made this extra special – almost a little meditative. The bread is something you won’t find in many stores so it feels special to eat in that way, too! For this coming Easter holiday, my hope is to make this bread and gift it to friends and family as well – it’s definitely a labor of love and could be packaged cutely with some cellophane and ribbon to make an Easter hostess gift.

What I would do differently: Really, nothing. Well, maybe I’d get adventurous and try the icing!

Things I also enjoyed while doing this project:

-Eating this bread toasted with some butter

-Reflecting on amazing times with family and the kick butt ladies who influenced me

-Introducing my husband to the concept of the “flour fairy” (aka: flour on our kitchen floor)

Project 13: Focaccia

Prepare your flour! These next few projects will include my favorite bread recipes. My love of making bread started when I ventured into sour dough as one of my annual hobbies. For a long time, I thought the only bread I was capable of making was sour dough but the addition of a bread maker to my life and the desire/necessity to make bread at home during covid really brought some variety to my bread making. Over the next couple weeks, I’ll cover my top bread recipes as well as any modifications I make to them, too, so get your flour ready to follow along!

Quick project summary: I never thought to make focaccia at home until a coworker sent me photos of some she made a couple months back. I assumed focaccia was very complex previously but when she shared the recipe I was shocked – no kneading and very few ingredients despite the rich flavor. For focaccia, I use this recipe from bon appetit.

In terms of modifications, a few things to be aware of:

-I use the quick rise method! Our fridge is always too full to sit bread in there to rise overnight. And, this is surprisingly quick rising. I’ve made this recipe about 5-7 times and I started noticing that although the first rise is 3-4 hours, it is often ready after 2.

-For the first rise, definitely make sure to get full coverage of olive oil on the dough. It’s very sticky and will stick to your silicon or plastic wrap very easily.

-When I’ve made this, I’m often freezing all or at least part of it to give to a friend later. With that in mind, I skip the garlic butter on top and instead add rosemary to the bread before I bake it. On top of the freezing, the bread is already pretty rich with olive oil and I personally think the garlic butter may be too much moisture on the bread.

Things I loved about this project: The process of making this focaccia is both easy and fun – if you follow along, you’ll see in the recipe that you get to put the wrinkles in the bread after the second rise by poking your fingers on the risen dough. Usually, I’m being so cautious with my bread dough after it rises and so the chance to make a mess and not have to worry about deflating my bread was weirdly fun.

The recipe is also very forgiving. There have been one or two times I’ve thought I had too much or too little flour or the dough didn’t quite feel the same yet the end product was still great. And finally, I don’t always eat a ton of my baked goods but this focaccia is a bread I love to eat – both plain or dipped in some olive oil or even marinara sauce.

What I would do differently: So far, I’ve only tried this recipe using the baking sheet method for a thinner focaccia. I’d really like to try the 9 by 13 pan to get a thicker bread sometime soon but given how quickly and how much this rises, I haven’t done the 9 by 13 version.

Things I also enjoyed while doing this project:

-Watching episodes of Never Have I Ever on Netflix

-Drinking lemon spindrifts (and being basic)

-Multitasking while baking on conference calls

Project 12: Chocolate Covered Strawberries

I’m not even sure if chocolate covered strawberries are really elevated to the level of being considered a “project” but I love them so much so here we go. Also, my mother taught me never to go to someone’s house empty handed and I think homemade chocolate covered strawberries (especially if you can wrap them in a cute box) are an awesome hostess gift.

Quick project summary: I think most of us probably know how to make chocolate covered strawberries. However, a few fun modifications that I like to do:

  1. Wash the berries a couple hours in advance of when I actually cover them in chocolate and let them sit out on a paper towel for a couple hours. This makes sure they’re super dry and no moisture gets between the berry and the chocolate.
  2. Use strawberries with the stem on which look a little extra snazzy (see above) and are a bit easier to eat.
  3. Use chocolate melting bowls which make the melting/dipping process a lot easier.
  4. Add some chocolate curls and some gold or silver sugar sprinkles before the chocolate hardens.

Things I loved about this project: First, these are two of my favorite foods: berries and chocolate. Second, when you’re going to someone’s house but don’t have a lot of time for food prep, this is really easy to make and unique compared to other hostess and potluck type items. Third: chocolate chocolate chocolate.

What I would do differently: Really not too much. However, I think wrapping your berries in a cute chocolate gift box with a bow makes them seem like a hostess gift versus just a potluck dish. I’ve brought them in tupperware to parties before and while that’s fine, a little gift box would better match the classiness of berries.

Things I also enjoyed while doing this project:

-Taste testing multiple types of chocolate

-Eating the chocolate before it was melted

-Eating the chocolate after it was melted

-Eating the leftover chocolate

Project 11: Kids Rocking Chairs with Pillars

Do you ever go to a toddlers birthday party and watch them open approximately half their gifts which seem roughly the same? Maybe it’s just me since I don’t have kids but it’s really hard to tell the difference between a lot of gifts for toddlers. I pay extra attention to this because I still remember that I received 3 Candyland games at my third birthday – thankfully my parents trained me well and when I opened each one I noted that now I’d have a Candyland for all of my favorite rooms in the house. Anyway, I can’t stand buying kids gifts that are ordinary/the same as everyone else’s presents. Because of that, I love making both these rocking chairs or doll houses for gifts. (Doll houses will be a future project!).

Quick project summary: In case I accidentally impressed you, I did not do the woodworking for these chairs. You can buy small unfinished rocking chairs at Michaels. This chairs are a little pricey but the quality is good and if you wait for the 20 percent off coupon, totally worth it!

You’ll also need some sand paper, your paint colors, and a clear varnish. For the paint, you can either use a spray paint that is weather proof or you can just do a traditional paint/brush. I’ve done both and I found the spray paint with a brush on the side to smooth it out looks cleaner/nicer than just a paint and brush – the layers go on very well and you don’t see any brush strokes.

Optional: You may want a painters cloth or tarp if you spray paint. I used trash bags and didn’t feel like they worked quite as well. (See the “what I would do differently”). Regardless, this is definitely an outside/garage project.

Here’s the quick steps for this project:

-Sand

-Paint – probably about 3 coats (maybe 4 depending on your color). You can also prime these chairs if you want but I did not.

-Add embellishments – I sponged on some polka dots and also used a paint marker to write the names of the recipients on the top rung of the chair on the back.

-Varnish – probably 2 coats

Also optional: I added some little pillows. If the recipient is particularly tiny, they may need a little boost from a pillow and I thought the pillows made the chairs feel extra cozy. I also bought the pillows at Michaels (plain white) and then added an iron on. As you can see, my adorable kitten also approved of the pillows. As you can also see, I bought her a Halloween collar at Michaels, too – she wore it for approximately 3 minutes.

Things I loved about this project: This definitely makes a unique gift for the kiddos in your life. And, while it feels unique and special, you don’t have to be too skilled in painting to make the chair. You could certainly get a lot fancier and paint some flowers or other fun scenes on it beyond just the polka dots but these still come out really well without the additional flair. Maybe I’m sentimental but I like this a little extra because I had a rocking chair with my name on it as a kid, too (and, I’ve still saved it).

What I would do differently: So, apartment living is not the ideal place to make these chairs. I did the painting on our balcony and honestly stained our balcony in a way that required a lot of unexpected scrubbing and clean up. Also, I think the pillows I got were just a little too large – I’d go for something a bit smaller than what is picutred.

Things I also enjoyed while doing this project:

-Sitting on the “poofs” on my balcony and drinking wine

-Listening to Missy Elliott (my favorite artist of all time)

Project 10: Lavender Rose Sachets

For our wedding, instead of any type of favor or the traditional welcome bag, we did a welcome bag of homemade items. Making these bags was probably one of the most fun parts of wedding prep! The bags included some of our favorite things or our families’ favorite things and then a hand written thank you note. One of the items we included in the fake welcome bag were these lavender rose sachets. We got married on a farm with all wildflowers and a semi-nature-y vibe so these were fitting.

Quick project summary: The first step to the sachets was picking the scent and as a result, the filler. For our wedding, I ended up using dried rose petals/buds and lavender. I was able to order a fairly sizable bag of rose petals/buds as well as culinary lavender on amazon. You could choose any scent you like but we picked roses and lavender as my grandma’s favorite scents. I previously did these with jasmine and chamomile. Here’s a link to a little variety pack to get you started.

The second step was the packaging. We could have gotten a lot fancier on the bags but because we were making 120 of these little guys, I choose a simple thule bag with a built-in drawstring. For longevity, you could probably actually sew the filler into a bag with sturdier fabric.

From there, I mixed the rose and lavender and dropped a couple of drops of essential oil on the mixture (both rose and lavender). Rose was a lighter scent than lavender naturally so I added more rose oil than lavender. I added just enough oil to bring out the scent but did not make anything wet otherwise the sachets would be soggy.

Once the mixture was ready, I stuffed the bags using a tablespoon scoop (about 3 per bag) and double knotted the bags. Optional: You could add more oil to the outside of the bags OR skip the step above and only add some oils to the outsides of the bags once stuffed.

Things I loved about this project: This was a fun, homemade and sentimental part of our fake wedding welcome bags. I personally have a lot of thoughts (which I won’t share here) about how out of hand wedding expenses and extras can be so I loved being able to give folks something that was unique but was also homemade and not expensive at the per unit cost. These would make a great baby or bridal shower favor also!

What I would do differently: I’d definitely use a bit sturdier bags in the future – for a more long lasting (but also more effort) sachet. Additionally, these would have been gorgeous with a sprig of lavender tied into the knot on the front.

Things I also enjoyed while doing this project:

-Listening to the Oprah Soul Conversations podcast (yep, I admit it)

-Drinking lemon lift black iced tea made in a sun tea jar on our balcony