Project 29: Bedroom Redesign

These next couple posts will be focused on some of the places I have revamped in our apartment to make them just a little cozier. For me, my home often mirrors the state of my brain and so a calm and cozy home means a calm mind but a home that is full of clutter or too stiff always makes me feel unsettled. Because of this, I have done two pretty large closet and home cleanouts in the past 3 years and now have finally started doing mini reorganizations every quarter. I find the latter much less overwhelming and I pick just a couple of places I want to tidy up/make cozy.

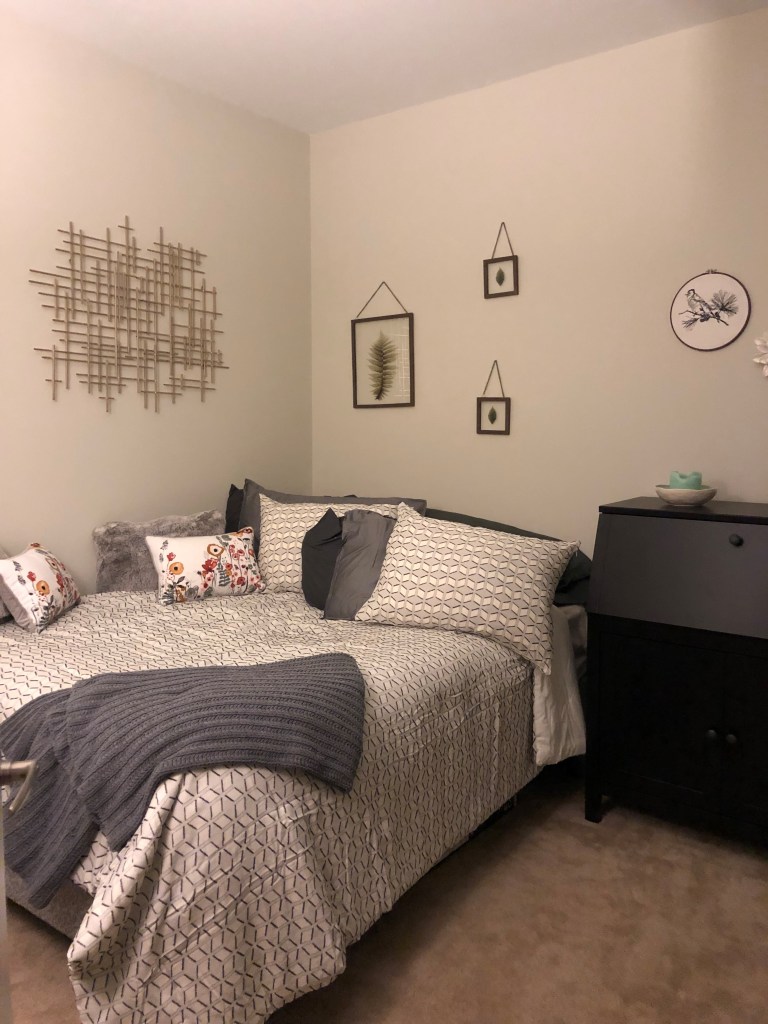
Quick project summary: Prior to this, our guest bedroom was a combination of items that both my husband and I brought when we moved in together from old apartments. They were just fine but didn’t really match too well and were pretty plain. That said, we don’t use our guest bedroom that often so I didn’t want to purchase any new furniture and just wanted to spruce it up. Additionally, our guest bedroom has no windows (it’s technically a den) so it can be pretty dark and we had dark navy colors as our primary accents.

Here was my recipe for a surprisingly effective but low cost spruce up:

-Color scheme: I picked a fairly simple color scheme so as not to make the room too busy given that it was small. For me, this meant white (to keep things light), gray (light and dark) and blue. I also used some gold accents as well.

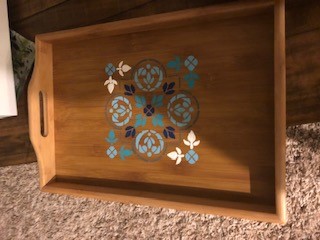
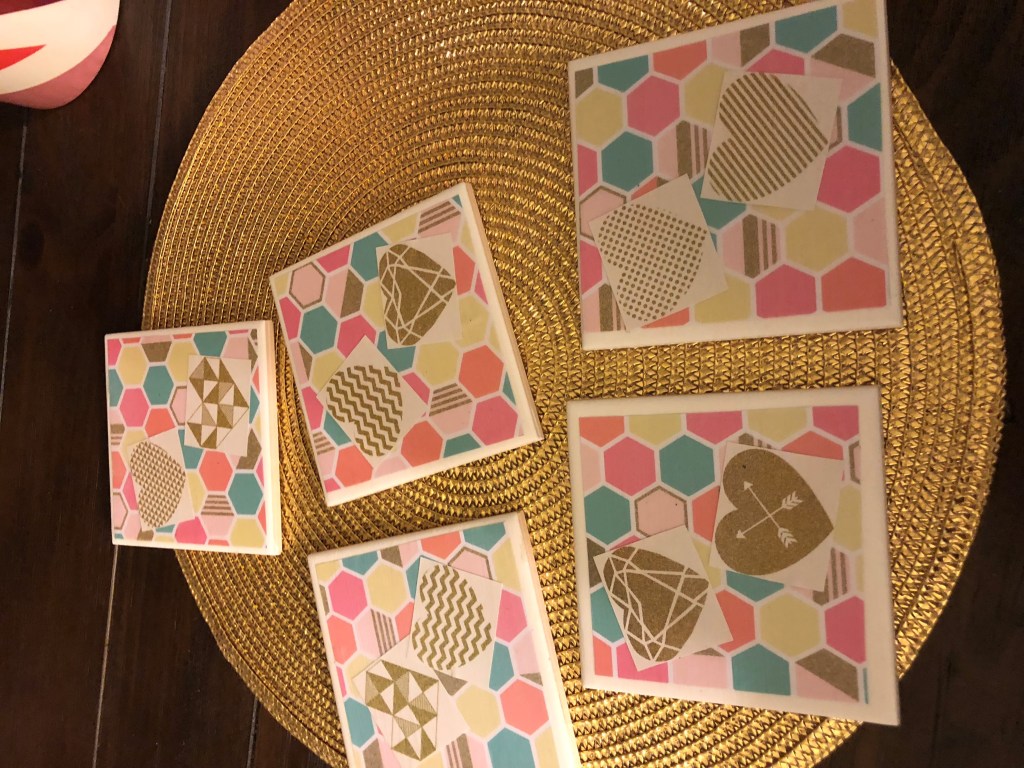
-Shapes: I wanted to add some fun shapes to the room and so I focused on getting a geometric pattern for the bed complemented by some fun geometric and circular art on the walls.

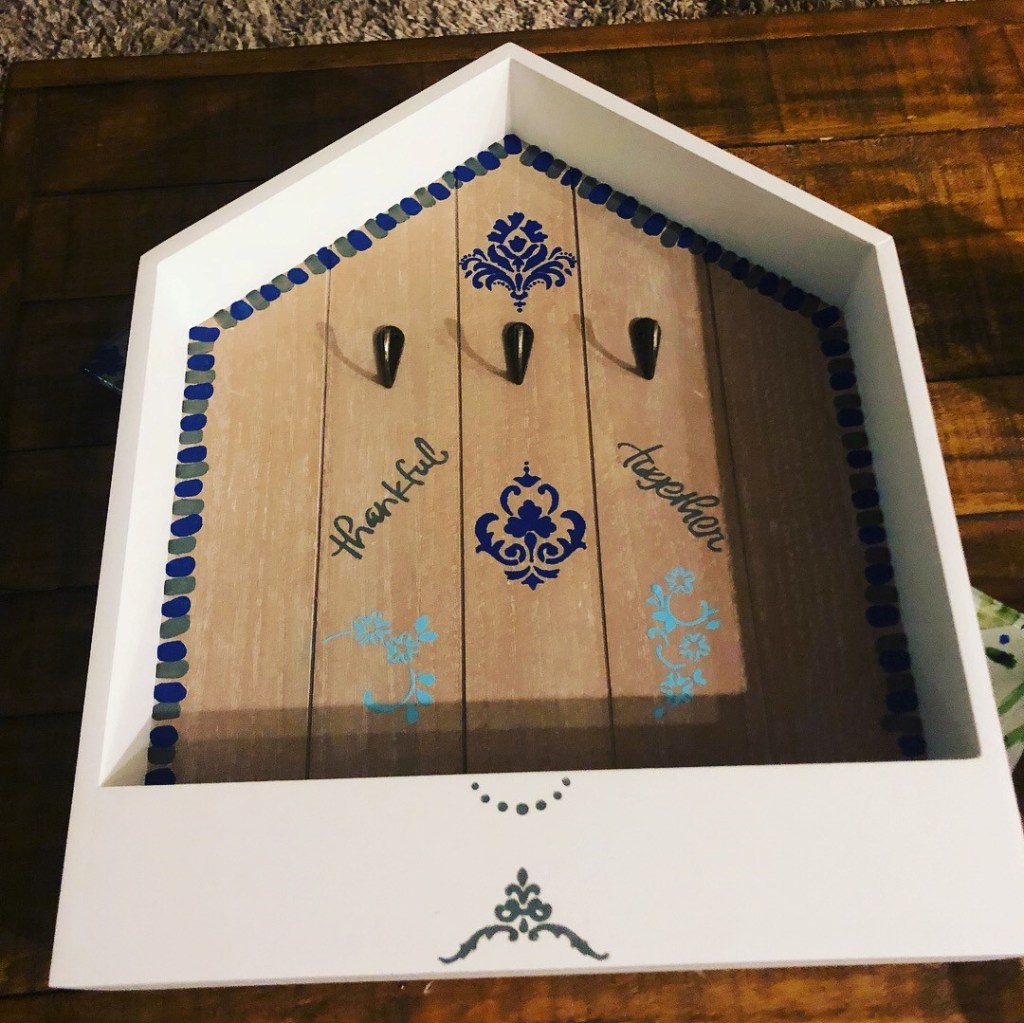
-Wall Art: For the walls, given the small space and lack of windows, I wanted to add a bit of dimension instead of just canvases or paintings. For this, I added a combo of a larger metallic piece, cross stitches, preserved leaves, and a white ceramic flower (not pictured). I also got a fairly sizable mirror which I placed on the wall over a dresser at the end of the bed – this was great for guests who wanted to get ready in that room but also made the room feel a bit larger. This room is pretty small and we have the bed, a dresser, and a desk/desk chair in it.

-Pillows: I subscribe to the theory that every room can be made better with additional pillows. For this room, going with my theme of fun textures, I got some new pillow cases to match my color scheme and also got both furry and beaded pillows to add to the bed. Because we don’t have guests that often, I also like surrounding two sides of the bed with pillows – so, while this bed is still a queen size bed, it looks a bit like a daybed and we use it to just sit or relax/read.

-Blankets: Blankets are strong contributors to cozy vibes in my book. Every bed I ever make will have a blanket on the bottom corner just for some additional cozy. And, every room of the house has at least 1 usually 2 blankets in it (minus the kitchen of course).

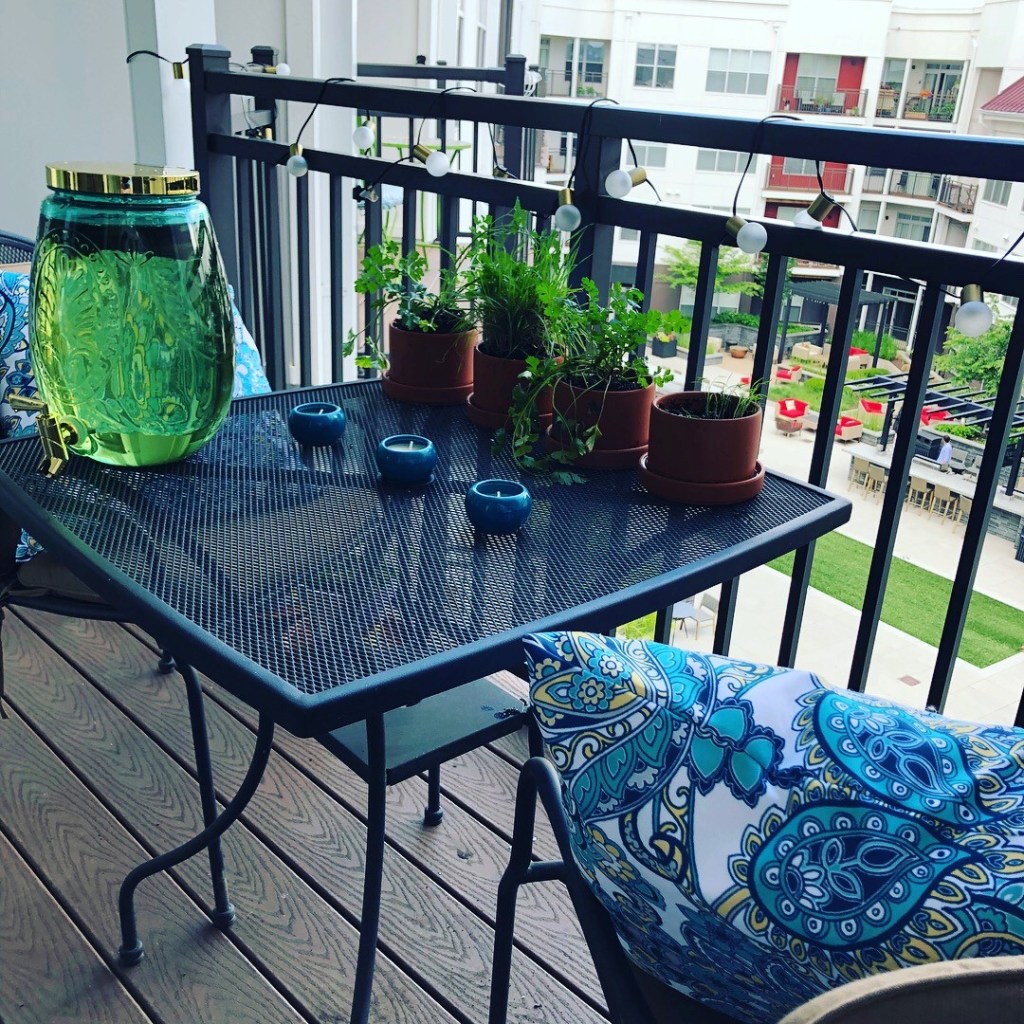
-Candles: This goes without saying! Candles. Always candles.

Things I loved about this project: Overall, I probably spent between 200 and 300 dollars on this project at a combination of HomeGoods and Target. In my opinion, this was SO worth it for the result. Our guest room went from a room we almost never use to instead being another sitting/chilling area in our apartment. I’m even more grateful now that we have been working from home to have a second space that is cozy for working.

What I would do differently: Sometimes (read: always) when I start on an organizing project, I become singularly focused on finishing the reorganization ASAP. I think I could have shopped around a bit more for some more unique pillows or some different wall art.

Things I also enjoyed while doing this project:

-Doing a Burts Bees under eye mask from Target

-Browsing the candle aisle at Target

Project 28: Sun Tea

I often joke that I am turning into my grandparents – I always have a pitcher of fresh homemade iced tea like my grandma and I eat raisin bran cereal for breakfast daily like my grandpa. Family and friends also often tell me that I’m turning into a grandma but I think the connotation is less about delicious iced tea and my favorite cereal and more about me being a “yoldie” (young old person!).

This project is so easy but perfect for the 90+ degree heat we are having in the DC area and it tastes like summer.

Quick project summary: To make my sun tea, I prefer to start with a big container so I have tea all week. I bought the adorable container above at Target on sale for less than 10 dollars a couple years back.

I fill that container with filtered water and then I add in a about 10 tea bags of my favorite green or black tea. Typically I do a green pomegranate tea. I let it sit for 3 hours or so in the sun. At that time, I wash and muddle some raspberries and wash some fresh mint and break up the leaves a bit and then add them in. I let it sit for a couple more hours and then bring it inside, pour into a pitcher and store in the fridge. Quick, easy and delicious!

Things I loved about this project: I have an iced tea obsession and have nothing more to say here.

What I would do differently: I haven’t played around with other flavor combinations but I’d love to do something with lemon and lavender in the future.

Things I also enjoyed while doing this project:

-Reading Untamed by Glennon Doyle while sitting on the balcony and waiting for the tea to be ready

-Listening to the Food Psych podcast recommended by a friend

Project 27: Wood Painting Projects

Two or three years ago, I started to see a bunch of shops pop up that were wood painting workshops for signs, trays, etc. As a lover of crafts, I always appreciate seeing new types of crafting shops pop up that are a bit different than pottery or sip-n-paint spots (not that I don’t love both of those, too, because I do – in fact, my coworkers knew I loved sip-n-paint so much that they threw me a surprise 30th birthday party at a sip-n-paint – pretty epic honestly). I was thrilled to see these shops pop up and thought it would be a perfect way to share my love of crafting with coworkers – I also really feel that when you get together with coworkers outside of the office to create something non-work related, it also inspires you to be creative together in the office. So, I set out to create a wood painting project at home.

Warning: this is not for the faint of heart! Having 13 of your coworkers to your house to paint is ambitious (or maybe crazy?) and there were a couple of scary moments where paint was dropped on stools and counters and I had to maintain my low key vibes! Additionally, on this particular evening, I also ordered in catering from Chipotle so we could eat while we painted – my cats stole a substantial amount of carnitas from the serving tray in front of my coworkers and then one of them pooped on our guest bed WHILE MY COWORKERS WERE STILL AT MY HOUSE. Please note I was fairly new to this team of coworkers so this made a really nice early impression. Also, to top it all off, after my coworkers left, the cats stole and ate tortillas, too – they are little wizards who can apparently open containers covered in foil and packages wrapped in paper. Enough about my cats because even though I wish this was a cat blog, I know it isn’t.

Quick project summary: For starters, acquiring supplies for this project was a bit disjointed because I essentially researched what the wood painting shops do and then tried to back into creating a simpler version of the experience. Here is what I ended up using for supplies (all of which I got off amazon for very reasonable prices):

-Pre-finished but plain wood household items including: serving trays, mail holders, blank signs, and combined key/mail holders (my personal favorite)

-Painters tape

-Variety packs of acrylic paints

-Sponges

-Stencils – both traditional plastic stencils and “stick on” stencils which I find a bit easier to work with

From there, as you can see above, I just set up the supplies and let everyone paint away. It took about 3 hours for everyone to paint and chat but we all really enjoyed ourselves. Overall, my two favorite pieces that I made were the stenciled tray and the key/mail holder – I found that less was more on the painting since the pieces were pre-finished.

Important sidebar: a key supply for this evening was also wine as all of the wood painting shops seem to provide you with at least 2 glasses of wine.

Things I loved about this project: I loved sharing my love of crafting with others (always do). And, while our final products were no where near as advanced as what you’d make at a formal crafting store, we made some pretty neat items that I still use.

What I would do differently: MORE/ANY drop cloths! I basically laid trash bags as drop clothes on surfaces but it was not enough when you have a large group painting!

Things I also enjoyed while doing this project:

-Eating lots of guacamole from Chipotle

-Hanging out with coworkers in a non-work setting

Project 26: Make a Sour Dough Starter

There a million articles and blogs out there about making a sour dough starter. I started making sour dough about 6 years ago now and for a long time I made it on a weekly basis. Because there’s so much out there on sour dough starters themselves, this post will be mostly focused on just my personal tips and tricks versus details of how to get your starter going!

Also, if you haven’t read this article about sourdough, stop reading the blog and click this link.

Quick project summary: In my time as a mom to a sour dough starter, I created starters a few different ways. First, I had a traditional starter that I made from just flour and water. This one was a pretty solid starter but it took quite some time for the flavor to really taste like sourdough – probably about 4-6 months. Second, I made two other starters – one use a sourdough starter pack and another using live starter (to help my starter get going) from King Arthur Flour. Personally, among all these starters, I found the King Arthur Flour starter to be the most flavorful. I know everyone wants to make their starter from scratch and some might consider this “cheating” but I do not and really enjoyed this method!

For quite some time, I had two starters going at once. This helped me not to overuse one starter (because I was baking bread at a rapid pace) and also helped me experiment a bit with how I was feeding the starters, too. Ultimately, during a move, I got rid of the starter that was a bit less flavorful.

Enough about starters themselves and on to the actual sourdough bread baking. Personally, in my early sourdough days, I loved to bake a bread that was bakery style – no yeast, dutch oven, and a multiple day process of kneading and rising (very instagram worthy!). Over time though, I wanted a quicker option and some bread that would be a bit more sandwich style – for this, my favorite is King Arthur’s Rustic Sourdough. I would modify this a bit and make the rustic sourdough in two long loaf pans – I’d also add in some spices (my favorite being rosemary).

Things I loved about this project: Having a sourdough starter is fun to maintain and to play around a bit with the chemistry of the bread. Personally, I felt like making a starter was one big science experiment and brought me back to my lab classes in grade school. I genuinely enjoyed seeing how my starter evolved. Also, once you starter gets really active, there’s so many options for what to make and I enjoyed experimenting with pizza crusts and other non-bread options.

Most importantly, baking bread is like therapy for me. When I have a busy day ahead at work or something is on my mind, I’ll often start by getting some type of bread going. The kneading process is really relaxing – it’s a combination of attention to detail and working with your hands that I feel is clutch for helping resolve some stress or anxiety.

What I would do differently: I lost a bit of steam on making sour dough and I started focusing more on other breads. When that happened, my starter slipped a bit! Be right back while I go work on my starter.

Things I also enjoyed while doing this project:

-Binge watching the Americans while making tons of bread

-Eating sourdough with homemade jam (and all other toppings!)

Project 25: Tile Coasters

A shout out to my friend Chrissy who introduced me to this project! These coasters were super fun to make and worked with modge podge which I haven’t used much of before (except to preserve puzzles – more on that later).

Quick project summary: To make these coasters, I started with bulk plain white square tiles bought from Home Depot. You can go to the tiling section and buy them for 10 cents or less – so cheap – and you can’t tell from this photo but I went coaster crazy and bought 100 tiles. That said, it’s not as absurd as you think especially if you want to gift coasters in sets of 4.

In addition to the coasters, I picked up the following supplies at Michael’s: a 25 pack of sheets of felt, a couple different books of scrapbook paper, Elmer’s glue, and modge podge.

To start the project, I first applied the felt backing. To do this, I cut out a square of felt a little bit smaller than the tiles. I used this as a template and cut enough felt for each tile. I used Elmer’s glue to glue these on and let dry for about 12 hours.

From there, I then created the same template but with the scrapbook paper for the front of the coasters. While I wasn’t particular about the felt colors, I did spend more time designing and selecting the fronts of the coasters. Some of them I used a single sheet of paper but others (like those on the top left), I used multiple layers of cut outs.

For applying the scrapbook paper to the tile, first I painted the blank tile with modge podge, then aligned the scrapbook paper, and painted over that with modge podge as well. I let this dry for an hour or so and applied another coat. If you are using multiple cut out layers, I’d recommend adding the second layer between modge podge coats.

For me, I used about 3 or 4 coats of modge podge but you really just want to see if the scrapbook paper feels secure and like it won’t peel off of the tile to know that you have enough coats.

Things I loved about this project: Working with modge podge was really enjoyable and reminded me that I need to explore more modge podge projects in the future! These were also fun gifts – especially for friends or family who have way a lot of stuff and are hard to shop for!

What I would do differently: I’m admittedly not the most patient person. I wish that I had waited a bit longer between coats of modge podge – some of my coasters were over-painted because I got a bit ambitious (read: impatient) when applying modge podge.

Things I also enjoyed while doing this project:

-Drinking chai tea out of a funny 30th birthday mug I received as a gift

-Reading inspirational quotes in the scrapbook section of Michael’s

Project 24: Painted Pot

Overall, I love apartment life – everything is convenient and easy but living during covid means that I’ve been reminded of a few things I don’t love about apartments. Most notably, the fact that we don’t have personal space to grill and garden. That said, we’re very lucky to have a pretty spacious balcony (for an apartment!) and so I like to decorate and enjoy that space and when possible, plant some herbs. (Future blog post to come on how to make a “tiny balcony oasis” on a budget.)

Quick project summary: I’ve done painted terra cotta pots a couple of times. The first time I did them personally (the larger ones above) for planting some herbs on the balcony. The second time we actually used them as part of our wedding welcome bags – we did smaller pots and because all the flowers for our wedding were from a local grower, we also included a little pack of seeds with them.

For the pots above, I used acrylic paint. I personally really like the Martha Stewart paints that are good for indoor/outdoor and are multi-surface. To get the geometric vibe, I used painters tape and created a pattern and painted in all the surface area not covered by tape. I then let the pot dry and removed the tape. From there, I used a small circular sponge brush to make the polka dots.

For the pots for our wedding, I painted the pots entirely red and then did a light gold sponge paint on them.

Things I loved about this project: I enjoyed jazzing up what is normally a pretty plain item and they definitely added to the cozy balcony vibes at our apartment, too.

What I would do differently: I kept the pots for our balcony for two years and I never took them inside (oops!). The winter wasn’t so good to them and the second year they became a bit faded. I’m pretty sure bringing them indoors or adding some type of varnish or gloss paint on top may have solved this problem.

Things I also enjoyed while doing this project:

-Redecorating our balcony so it was super zen

-Listening to 90s hip hop music

Project 23: Straw Clutch

I enjoy crafting just for the sake of it but every once in a while, I find a project that I personally love a bit more than my typical projects – these straw clutches and the straw beach totes I made later are one of them! I made these over the summer and gave them as gifts for summer birthdays and made sure the ladies of my family had matching beach totes. At the time I made them, I was seeing similar looking straw bags with pom poms and tassels at J Crew and other brand name stores for between 30 and 50 dollars so making these for under 10 dollars was so fun!

Quick project summary: Each year, Michael’s typically sells some type of summer clutch and matching beach bag in whatever type of material is most in style – straw, canvas, etc. They’re usually pretty inexpensive but very on-trend so I always like to take a peek in Michael’s in early Spring to see what they have set up for summer. For this project, I bought the clutches and then given that pom poms and tassels are trendy recently, I got neon tassels and pom poms and simply hot glued them on to the bags. And, then I was done. This legitimately is a 5 minute craft!

Things I loved about this project: I rarely make a craft that I feel is trendy or is something you might see at a store so I really enjoyed generating a “cool” end product. The process of making this was so speedy, too which made this a good craft that I could still do on a work night. I still carry my own clutch around and my friends and family that I gifted these to seemed to really enjoy. Additionally, in case you can’t tell, my cat also loved this project – I apologize to those of you who also received a bit of cat hair stuck to your clutch.

What I would do differently: I would like to retry this project adding on some interesting beads or buttons instead of the pom poms and tassels. The pom poms and tassels are a bit flashier and I think beads/buttons would make a more subdued but equally unique bag!

Things I also enjoyed while doing this project:

-Watching my kitten play with pom poms for the first time. You probably didn’t need all the photos of the clutches given how simple this project was but for my fellow cat ladies, I wanted to demonstrate that this project serves a dual-purpose as a human craft and cat toy. Note that since this project, miss Peach cat has become a pom pom fanatic and recently received 100 pom poms for her “gotcha” day.

-Laying on the beach in Cape Charles, VA admiring my tote

Project 22: Smoothie Bowl

I’m not sure who made smoothie bowls popular but I feel as though I owe them a personal thank you. Smoothie bowls are one of my favorite treats and any day that includes a smoothie bowl is a good one. While I most often buy smoothie bowls, I sometimes feel inspired to make them at home.

Quick project summary: For the smoothie bowl base, I personally like to mix frozen bananas, other frozen fruits (mangoes, peaches or berries usually) and then some spinach (not frozen). To that mix, I’ll usually add some unsweetened almond milk and if things aren’t quite frozen enough, then I’ll add a few ice cubes. I like to blend until the mixture is super smooth but there’s a fine line between a smooth mixture and one that is too liquid. I tend to use the “pulse” setting on the blender versus just leaving it run so I can frequently check on the texture.

I like to keep my base non-dairy but you could definitely add some yogurt, too – when I’ve added greek yogurt previously the consistency is a bit better.

For the toppings, as you can see from the above, I enjoy going all in – my favorite toppings mix includes: berries, any remaining banana I did not blend, some type of more tart fruit (kiwi), nuts, granola, shaved coconut, and then often times a nut butter. I know it all ends up in my belly but I also like to have some fun with the toppings presentation and I swear it tastes just a little better this way.

Things I loved about this project: Smoothie bows are delicious. Period. And, when you buy them out (which I often do), they’re a bit overpriced so making them at home feels fiscally responsible.

What I would do differently: I would like to try adding some nut butter or avocado to the base instead of just as a topping. When I buy smoothie bowls at a restaurant, they often have those heartier toppings mixed in and it makes the bowls a bit more filling.

Things I also enjoyed while doing this project:

-Drinking pomegranate green iced sun tea

-Painting my nails using a new OPI gold glitter polish

Project 21: “Homemade” Soap

“Homemade” soap is a project I’ve been doing for about 6 years and I make it almost annually. It’s overall a fairly easy, albeit messy, project and I love that the outcome is both useful for me and as gifts. That said, I call this soap “homemade” (note the quotes) because it’s really more that you’re adding scents, colors and shapes at home but not actually making homemade soap – that is a project a bit outside my scope of capabilities!

Quick project summary: For making soap, I personally prefer to keep it simple because I usually make large batches. That said, you can do a ton of really fun and creative infusions with soap if you feel so inclined. For starters, I typically buy either glycerin or shea butter soap in large blocks from Michael’s – it’s expensive so wait for the coupons!

From there, I actually use a soap kettle to melt the soap until it is fully liquid (I also got this on super sale and it was under 25 dollars and was well worth it for the amount of soap I’ve made over time). You could use just your regular pot on the stove, a slow cooker or a rice cooker to do this.

After the soap is fully liquid, I add scents and color (also both bought at Michael’s – my favorites scents are the sandalwood or lavender). From there, if I’m adding anything into the soap (for example, actual culinary lavender pieces or rose petals), I add them into the soap molds. And finally, I pour the soap over. For molds, I like either some of the special shape silicon molds that are sold for baked goods or chocolate making as well as using just a typical loaf pan.

About 12-16 hours later, I will pop the soap out of the molds or if in a loaf pan, pop them out and then slice the soap into individual bars. I then usually use the small treat bags and a tie (pictured above) to wrap and gift.

Things I loved about this project: As mentioned, this is pretty darn easy and also pretty simple to mass produce. We gave bars of soap in our wedding gift bags and to make over 200 bars, it only took one weekend. Additionally, the soap never goes bad or expires so you could make a bunch of soap to be a year supply for you or for gifts.

What I would do differently: I’ve seen some really awesome soap on Etsy or on other crafters’ blogs with beautiful patterns or with loofah included in the bar. If I was a more patient person, I would most definitely try this!

Things I also enjoyed while doing this project:

-Listening to the Hamilton mixtape

-Avoiding the summer heat by crafting inside

Project 20: Natural Dye with Avocado Pits

It’s guest blogger time again! And thankfully my friend and fellow book club member is jumping on the quarantine dye trend with me. Jessica is one of the most resourceful and creative crafters I know so get ready for a fun project that you can do with stuff you already have at home! Also, important note: since Jessica wrote this post, she did adopt the cat she mentions at the end and is now a proud cat parent.

Intro to me and my project: Hello!! I’m Jessica, and I was lucky enough to be introduced to Eileen after she started dating her now-husband, who is good friends with my now-husband! I was so excited when she asked me to write a guest post for her blog. Eileen’s craftiness is inspiring, so even though I am often found baking or doing different types of needlework projects, I wanted to try something new for this! I have been intrigued by the examples online of people experimenting with natural dyes, so I decided to fully embrace my Elder Millennial status and try dyeing with avocado pits.

Quick project summary: I had a white tank top lying around that I spilled something (wine) on one too many times which made it the perfect test subject: If it worked it would breathe new life into the shirt, and if it didn’t work, well, I wasn’t wearing it anyway.

The first and most delicious step of this project was eating a lot of avocados. After I finished one, I would clean the pit well and put it in a plastic bag in the freezer. I saved seven of all different sizes, which ended up being about 3 ounces by weight. This website (https://www.kathryndavey.com/blogs/news/75241285-dyeing-with-natural-dyes-avocado-pits) suggests 3-5 pits per half pound of fabric – I wanted to deeper color so I went with a bit more!

When I was ready to dye, I filled a stainless steel pot with water, tossed in the pits, and let it sit on low heat for about an hour. When I saw that the color was getting darker, I added my shirt and let it sit in the water on super low heat for two more hours. This is a great project to do when you’re hanging out around the house – it’s very little hands on time!

After two hours, I turned off the heat and left the shirt in there for the rest of the day – about 7 more hours — because I wanted the color to get as dark as possible. Then I simply rinsed it in cold water and hung it up to dry. The final product was a nice salmony pink color. I am not sure yet how well the color will stay, but for now it’s pretty cute!

Things I loved about this project: Even though I knew the final outcome would be pinkish, it still felt magical to watch the water deepen in color as the pits were soaking. It was so fun to see how something I normally throw away without a second thought can be used to add some extra personalization or freshen up an older piece of clothing.

What I would do differently: I did very minimal research for this project. I read enough to know that people use mordants to help the dye adhere to fabric and fixatives to help set the dye, but I did not do enough research or planning to actually make that part of my process. This little experiment piqued my interest in natural dyeing, so in the future I may look into those a bit more and try again with different dyes (for example, turmeric makes a really gorgeous yellow color)! The coloring on the shirt was a bit uneven probably because, again, it was a well-worn shirt – a new shirt would probably make for a more polished finished product.

Things I also enjoyed while doing this project:

  • Listening to Blind Melon… I have no excuse, it just felt right today
  • Having my windows open and enjoying gorgeous weather after a cold spring!
  • Talking to a volunteer at a local shelter about adopting a cat 😊